
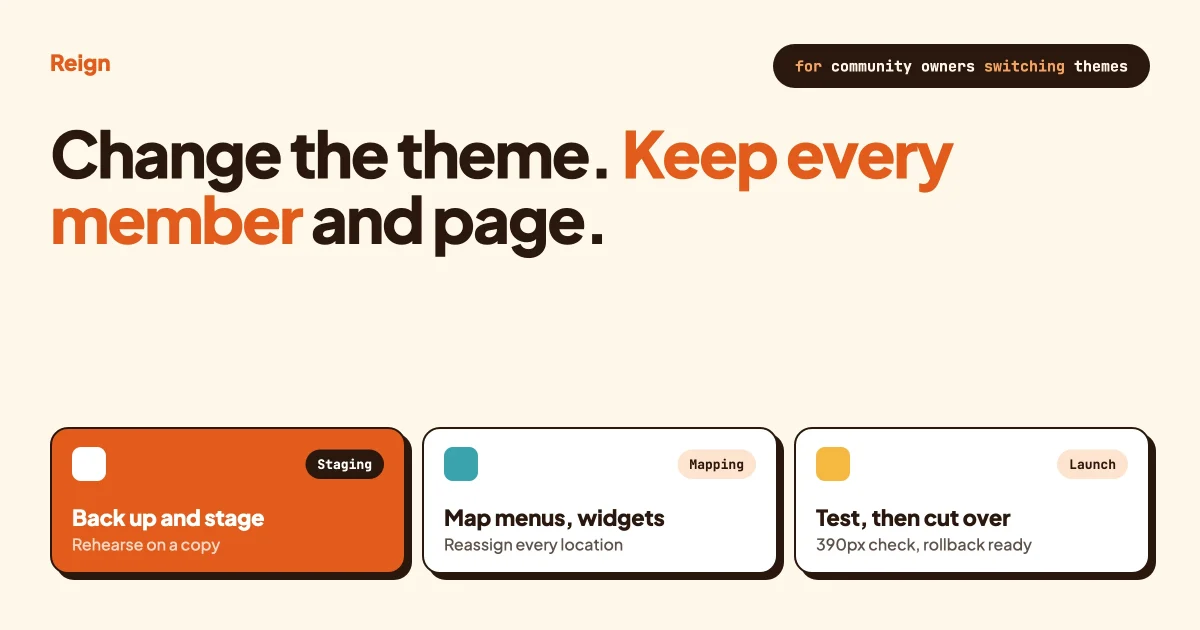
You can change a community site’s theme without losing members or content, because both live in your database, not in the theme. Members are WordPress users, and posts, pages, groups and activity are stored by WordPress and your plugins. What does not travel is anything the old theme owns: its menu locations, widget areas, Customizer settings, custom CSS, template overrides and shortcodes. Audit those, back up, rehearse on a staging copy, then switch in a quiet window with a rollback ready.
In this guide
- What actually changes when you switch themes
- Step 1: audit what the old theme controls
- Step 2: back up the site and test the backup
- Step 3: build a staging copy
- Step 4: install the new theme
- Step 5: map menus, widgets and Customizer settings
- Step 6: fix templates, CSS and shortcodes
- Step 7: test the pages members actually use
- Step 8: check 390px mobile
- Step 9: schedule the cutover
- Step 10: keep a rollback plan
- A checklist table you can copy
- Questions people ask
What actually changes when you change a WordPress theme?
Switching themes changes how your site looks and which design features are available. It does not delete your posts, pages, users or media. A theme, in WordPress terms, is a collection of template files, images, style sheets and code that changes how the site is displayed without changing the underlying software. That is how the WordPress documentation describes it.
The useful split is between two kinds of data. Content data belongs to WordPress core or to plugins: posts, pages, comments, users, and for a community site the groups, activity, profile fields and courses your plugins store. Presentation data belongs to the theme: menu locations, widget areas, the settings in Appearance > Customize, template files and any code in the theme’s functions.php.
The Customizer settings show how tight the link is. WordPress reads them through the theme-mods functions, and the source shows they are stored under a key built from the active theme’s slug, in the form theme_mods_ followed by the slug. Your old theme’s colours and logo placement sit under the old theme’s key. The new theme starts with its own, empty set. Nothing is lost, but nothing is carried across either.
Step 1: How do you audit what the old theme controls?
Write down everything the old theme does for you, in a spreadsheet, before you touch anything. The audit is the most valuable hour of the whole project, and it is the step people skip.
Walk through the site as an administrator and record these, one row each:
- Menu locations. Open Appearance > Menus and note which menu sits in which location. Themes register their own locations, so the names will not match the new theme.
- Widget areas. Open the Widgets screen and note every widget in every area. Themes register areas in code, and each widget is attached to an area by its id.
- Customizer settings. Screenshot every panel under Appearance > Customize: logo, colours, fonts, header layout, footer, sidebar layouts, login and register options.
- Additional CSS. Copy the contents of the Additional CSS panel into a text file. Do the same for any custom stylesheet or code snippet plugin.
- Template overrides. If you or a developer ever copied template files into a child theme, list them. These are the most likely things to break.
- Shortcodes. Search your content for square-bracket codes and note which ones the old theme provides, as opposed to a plugin.
- Page builder content. Note which pages are built with a page builder and which builder it is. Content stored by a builder plugin depends on that plugin, not on the theme, but its styling often leans on theme settings.
- Theme-bundled features. Some themes ship their own widgets, custom post types or login screens. Note any that members use.
- Plugin integrations. Note which plugins the theme styles for you: community plugin, forum, course plugin, shop.
To confirm the audit is complete, ask someone who uses the site as a member to name the pages they visit most. If any page on their list is missing from your spreadsheet, the audit has a gap.
What is theme-specific and what is not?
Theme-specific data is anything the theme registers or stores for itself. Theme-independent data is anything WordPress core or a plugin stores in the database. Use the table below as a first pass, then add rows for your own site.
| Item | Belongs to | What happens on a switch |
|---|---|---|
| Posts, pages, media, comments | WordPress core | Stay. Layout may look different. |
| Members, roles, passwords | WordPress core | Stay. Members log in as before. |
| Groups, activity, profile fields, messages | Community plugin | Stay. Styling comes from the new theme. |
| Courses, lessons, forum topics | Course or forum plugin | Stay. Page templates may look different. |
| Menu locations | Theme | New theme has its own locations. Reassign menus. |
| Widget areas | Theme | Areas are defined by the theme. Widgets may need re-placing. |
| Customizer settings | Theme | Stored per theme. New theme starts empty. |
| Additional CSS | Theme (Customizer) | Copy it out and re-test against new class names. |
| Template overrides in a child theme | Child theme | Do not carry over. Rebuild for the new parent. |
| Theme-registered shortcodes | Theme | Replace with a plugin or block that does the same job. |
Step 2: How should you back up before changing theme?
Take a full backup of the database and the files, and prove you can restore it. WordPress’s own backup guidance says you need both to fully restore a typical site: the database holds your posts and generated data, and the files include core, themes, plugins and uploads, plus wp-config.php and .htaccess.
The same guidance gives a working order. Back up the database first, then the files, ideally as one set. Restore the files first, then the database. It suggests keeping three to five recent backups in different places, such as your host, cloud storage and a local computer, and it says to always back up before an upgrade. A theme switch is at least as risky as an upgrade.
To confirm the backup works, restore it somewhere that is not production. A staging site is the natural place, which is the next step. A backup you have never restored is a hope, not a backup.
Step 3: Why build a staging copy first?
A staging copy lets you make every mistake in private. It is a clone of your live site on a separate address, where you can activate the new theme, break things, and fix them while members keep using the real site.
The migration guides say the same thing in their own words. The BuddyBoss guide lists the common mistake as treating the change as a simple theme switch and doing it on production, and warns that custom profile fields and component settings are where problems usually occur. Our BuddyBoss to Reign migration guide walks through that case in detail.
Step 4: How do you install the new theme?
Install the new theme on staging and preview it before you activate it. WordPress offers a Live Preview button on each installed theme, which shows how your site will look with that theme before you commit. Use it as a first look, not as the test.
Reign’s installation page lists the requirements and steps. Reign 8 needs WordPress 6.5 or later and PHP 8.0 or later, and the docs state that it will not run on older PHP. Download reign-theme.zip from your account, go to Appearance > Themes > Add New > Upload Theme, choose the zip, then install and activate. If the upload fails with a file-size error, raise your host’s upload limits or upload the unzipped folder over SFTP.
No community plugin is required for Reign to install. Once active, Reign Settings appears as a top-level admin menu with a Home screen and a “Brand your site” checklist covering logo, site icon, colours, typography, navigation menu, the light and dark toggle, licence and child theme. Free companion plugins install from Reign Settings > Extend, and Wbcom Essential is listed as the one to install on every Reign site.
The docs do not describe importing settings from another theme. Plan to set the design by hand, using the screenshots from Step 1 as your reference. It is also a chance to drop settings you stopped using years ago.
To confirm the install worked, open the staging front end in a private window and check that the header, footer and a blog post render without PHP notices or a white screen.
Step 5: How do you map menus, widgets and Customizer settings?
Map each old location to a new one, one row at a time, using your Step 1 spreadsheet. Menus and widgets are the two places where members notice a missing piece first.
Menus
A menu you built is not lost when you switch. It is simply not assigned to a location the new theme knows about. WordPress documents the fallback: if the theme asks for a location that is not found, it shows the first non-empty menu, and with no custom menu it generates a page menu. That is why a freshly switched site often shows a menu of every page in alphabetical order.
Reign registers seven menu locations. They are Primary for logged-in users, Primary for logged-out users, Left Panel for each of those two, Mobile Menu for each, and User Profile, the dropdown under the member’s avatar. With BuddyNext active, a BuddyNext Community Nav location also appears. Assign a menu by going to Appearance > Menus, ticking one or more locations under Display location, and saving.
Four details from the menu guide save time:
- The two Primary locations are separate, so fill both, or guests may see member links or the reverse.
- The phone menu falls back to the logged-in Primary menu if no mobile menu is set.
- Reign has no footer menu. Use a widget in the footer instead.
- Do not paste a Log Out link into the User Profile menu when BuddyNext is active. BuddyNext adds one, and a pasted logout link expires because it carries a one-time security code.
To confirm menus work, view the site logged out, then logged in, then on a phone-width window. Each state should show the right links.
Widgets
Widgets belong to areas, and areas belong to the theme. If the new theme has no area with the old area’s id, those widgets are not shown. WordPress keeps the widget settings, but you must place them again.
The always-available widget areas are Right Sidebar, which is the default for every content type, Left Sidebar and Footer Widget Area. When BuddyPress is active (and Youzify is not), it adds Groups Index, Member Index, Activity Index, Group Single and Member Profile. WooCommerce, LearnDash and other integrations add their own. One rule to remember from the docs: a widget area shows on your site only when it contains at least one widget.
Customizer settings
Set up the design in this order: logo and site icon, colours, fonts, header layout, then footer. The Customizer has eight panels: General, Header, Typography, Color Options, Forms, Content Layouts, Branded Login & Register, and Footer. Site Identity, Sub Header and Additional CSS sit at the top level. Reign lists five header layouts, colour tokens and a dark mode, all without code.
Step 6: How do you fix templates, CSS and shortcodes?
Move your custom code into a child theme of the new theme, and rewrite anything that targeted the old theme’s markup. This is the part of the project that takes longest on a community site, and it is where a staging copy pays for itself.
Why a child theme
A child theme is an extension of a parent theme. The developer handbook says it lets you modify a theme without directly editing its code, so the parent can be updated without losing your changes. It includes everything from the parent by default, you can replace a parent template by adding a file with the same name, and there are only two levels: parent and child. The one required file is style.css, with a Template header that must match the parent’s folder name exactly.
Reign provides an official starter. Go to Reign Settings > Tools and use Download child theme, which gives you reign-child-theme.zip. It is a blank starter, not a copy of your current site. It contains style.css, functions.php, readme.txt and a screenshot. When you activate it, Reign copies your Customizer and Reign Settings choices into it, so the site looks the same. Keep the theme name as “REIGN Child”, because Reign identifies it by that line.
The docs give the reason plainly: edits made directly in the reign-theme folder are overwritten on update with no warning.
Template overrides and custom CSS
Old overrides do not transfer, because they were written against the old parent’s markup. Treat each one as a candidate to delete. For the ones you keep on Reign, note that it has no buddypress/ folder: use bp-nouveau/ (or bb-buddypress/ on BuddyBoss Platform sites) in your child theme. Check BuddyNext’s own docs before overriding anything on a BuddyNext site.
Open the text file where you saved your old Additional CSS and read it rule by rule. Rules that set a colour or font on a generic element may still work. Rules that target the old theme’s class names will do nothing, and you can delete them.
The BuddyBoss guide gives the method: use browser DevTools to find the new class names, then rewrite. For a few quick rules, the Customizer’s Additional CSS panel is fine. For anything larger, the docs say to add rules at the end of the child style.css, which loads after all Reign stylesheets, so rules of equal specificity override Reign’s.
Shortcodes and page builder content
A shortcode that the old theme registered has nothing to run it once the old theme is inactive. Search your content for the codes you listed in Step 1. For each one, decide whether a plugin, a block or the new theme provides an equivalent, and swap it. Reign provides its own set, including bp_group_carousel, bp_member_carousel, reign_bp_user_menu and reign_display_posts, though each has its own attributes, so do not assume a drop-in match for another theme’s code.
Content built with a page builder is stored by the builder plugin, so it survives. What changes is how it inherits fonts, colours and widths from the theme. Open every builder page on staging and look at spacing, headings and buttons.
To confirm Step 6 is done, search the staging site’s pages for square brackets that are showing as plain text, and compare each builder page with production.
Step 7: Which pages should you test before launch?
Test the pages that members use every day, as a member, not as an administrator. Admin accounts see extra toolbars and skip permission checks, so an admin walkthrough misses real problems.
Create test accounts for each role you have: a new member, a regular member, and a moderator or instructor if your site has one. Then work through this list on staging:
- Login. Use the header button and a direct login URL. Confirm the login style you chose works and redirects correctly.
- Register. Register a new account end to end, including the confirmation email and any onboarding.
- Profile. View your own and someone else’s. Check custom profile fields, avatar, cover image and tabs.
- Group or space. Join one, post in it, and leave. Open the group directory and use its filters.
- Activity or feed. Post, comment, react, and upload an image.
- Messages and notifications. Send a message and confirm the bell and messages icons update.
- Forum. Open a topic, reply, and start a new one.
- Course. Open the catalogue, a course page and a lesson. If you sell access, test checkout in test mode.
- Search. Search for a member, a post and a group.
- 404 and empty states. Visit a missing page, an empty group and an empty inbox.
The pre-launch checklist asks for similar checks: browse in a private window as a visitor, register a test account and check the profile dropdown, notifications and messages, test search, and check both light and dark mode. Our community site checklist covers the wider launch list.
Step 8: How do you check the site at 390px mobile?
Check the whole test list again at a 390px-wide screen, because many members will only ever see your site on a phone. 390px is the width of a common modern phone, and it is narrow enough to expose header and table problems that a laptop hides.
The mobile guide lists settings to review under Header > Mobile Menu:
- Mobile Header Layout: Layout One puts the icons in a second row, Layout Two puts them on the logo row and is the default, and Layout Three is not offered when BuddyNext is active.
- A separate mobile logo, which only shows if Use a Custom Mobile Logo is on and the field has an image.
- Mobile Header Icons Options, which has its own order separate from the desktop icons.
- Mobile Menu Width, where phones always get a full-width menu.
To confirm a page passes, scroll it top to bottom at 390px with no sideways scrolling and every control reachable with a thumb.
Step 9: When should you schedule the cutover?
Pick the quietest window your analytics show, announce it ahead of time, and give yourself double the time you think you need. A cutover is the moment you repeat on production what you rehearsed on staging.
Find your quiet period from your own data: the hours with the fewest logged-in members. For a global community that may be a weekend early morning in your biggest time zone. Tell members a few days earlier, on the site and by email, that a design update is coming and what might look different. A short notice stops confusion turning into support tickets.
The BuddyNext upgrade guide gives a cutover sequence that applies to any switch: choose a quiet period, enable maintenance mode with a notice, take a fresh backup, repeat the staging steps, run the member walkthrough, clear all caches including page, object and CDN, and monitor closely on the first day. Our BuddyBoss guide adds that you should watch for member confusion over the first 48 hours.
On the day, follow a fixed order:
- Turn on maintenance mode.
- Take a fresh backup of the database and files.
- Update plugins to the versions you tested on staging.
- Activate the new theme (and the child theme), then re-apply the settings from your notes.
- Assign menus and place widgets.
- Run the member walkthrough from Step 7, including a 390px pass.
- Clear every cache layer, including any CDN.
- Turn off maintenance mode.
- Watch error logs and support messages for the first day.
To confirm the cutover worked, log in as a real member from a fresh browser and complete one everyday action, such as posting in a group.
Step 10: What should your rollback plan look like?
A rollback plan is a short written list that lets you return to the old theme within minutes. Write it before the cutover, when you are calm, not during it, when you are not.
Your plan needs four parts. First, a decision rule: agree in advance what counts as a reason to roll back, such as login failing, checkout failing or the member directory not loading. Second, the fast route: the old theme and its child theme are still installed, so you can reactivate them from Appearance > Themes, and the old theme’s Customizer settings are still stored under the old theme’s key. Third, the slow route: restore the backup, files first and then the database, in the order WordPress’s backup guidance gives. Fourth, a named person who makes the call.
Do not delete the old theme on cutover day. The WordPress documentation warns that deleting a theme removes its files and folders completely, including any customizations made to them. Keep it installed for at least a few weeks, and keep the pre-cutover backup until the new setup has been stable for a while, as the upgrade guide advises.
For Reign specifically, the docs describe a rollback for a Reign update: reinstall the previous version using the older zip from your account, then open a support ticket with your System status from Reign Settings > Tools. Back up before each Reign update, and keep code in the child theme so updates stay safe.
Is there a checklist I can copy for the whole switch?
Yes. Use this table as your project plan, tick each row on staging, then repeat the relevant rows on production.
| Phase | Task | Done when |
|---|---|---|
| Audit | List menus, widgets, Customizer settings, CSS, overrides, shortcodes, builder pages | A member confirms no key page is missing |
| Audit | Screenshot every Customizer panel and save Additional CSS | Files saved off the server |
| Backup | Full database and files backup, stored in two places | Restore tested on a non-production copy |
| Backup | Zip the old theme and child theme | Zip re-uploads cleanly |
| Staging | Clone the site, block indexing and outgoing email, set payments to test | Five pages match production |
| Install | Check PHP and WordPress requirements, install the new theme, activate the child theme | Front end loads with no errors |
| Map | Assign every menu location, both logged-in and logged-out | Menus correct in each state |
| Map | Place widgets in the new theme’s areas | Sidebars and footer match the plan |
| Map | Rebuild logo, colours, fonts, header and footer | Brand reviewed by the site owner |
| Fix | Port or delete each template override | No leftover old-theme files |
| Fix | Rewrite custom CSS against new class names | No dead rules remain |
| Fix | Replace old-theme shortcodes | No raw brackets visible in content |
| Test | Login, register, profile, group, forum, course, messages, search | Passed for every member role |
| Test | All of the above at 390px and on a real phone | No sideways scroll, all controls tappable |
| Test | Light and dark mode, if the theme offers it | Text readable in both |
| Cutover | Announce the window, maintenance mode, fresh backup | Notice sent days ahead |
| Cutover | Repeat staging steps, clear all caches | Real member completes an action |
| Rollback | Written rule, named owner, old theme kept installed | Plan shared with the team |
| After | Monitor logs and support for 48 hours | No open defects |
Which theme should you switch to for a community site?
Choose a theme that styles the community plugin you already run, because that decides how much of Step 6 you face. A general-purpose theme leaves you to design profiles, directories and group pages yourself. A community theme arrives with those screens styled.
Wbcom Designs makes Reign, so weigh this as the maker’s view. Reign styles BuddyNext, BuddyPress, BuddyBoss Platform and PeepSo, plus the Wbcom plugins, without add-ons. Paid add-ons cover LearnDash, LifterLMS, Tutor LMS, Sensei, Dokan, WC Vendors, WCFM, GeoDirectory and WP Job Manager. Reign has a Demo Installer, and it has been on WordPress for 13 years. If you are comparing options before you commit, read our roundup of WordPress community themes, which gives other themes their fair due, and our BuddyPress theme comparison.
Where can you read more before you switch?
If you are leaving BuddyBoss, the data layer is shared with BuddyPress, so profiles, groups and activity stay and the work is styling and custom CSS. Our BuddyBoss alternative post and Reign vs BuddyBoss comparison cover that decision. If courses are your main concern, read about moving off LearnDash and Kadence to Reign and Learnomy.
If you run Reign already and only want a different community engine, the theme stays. Our post on keeping your Reign site while upgrading the community covers it, and you can try the BuddyNext live demo or read about it at buddynext.com. Doing a theme switch and an engine switch on separate days keeps each rehearsal smaller.
Questions people ask
Will I lose my members if I change my WordPress theme?
No. Members are WordPress users stored in the database, and a theme does not own that data. They keep their accounts, passwords and roles. What can break is the look of the login, register and profile pages, which is why you test those as a member before launch.
Do I lose widgets and menus when I switch themes?
Your menus and widget settings are still in the database, but the new theme may not show them. Themes define their own menu locations and widget areas, so you assign menus to new locations and place widgets in new areas. WordPress shows a fallback menu when a location is empty, which is why a fresh switch often looks messy until you map them.
Can I change theme without a staging site?
You can, but the risk lands on your members. If you have no staging option, at least take a backup you have tested, use maintenance mode, and switch in the quietest window you have. A staging copy is far safer, and many hosts include one.
What about my custom CSS and child theme?
Custom CSS written for the old theme usually targets its class names, so most of it needs rewriting. A child theme is tied to its parent through the Template header, so an old child theme will not work on a new parent. Download or build a child theme for the new parent and move only the code you still need into it.
How long does a theme change take on a community site?
It depends on how much custom work you have. The BuddyBoss migration guide estimates one to three days where the data stays and only the theme and styling change. A site with many template overrides will take longer, and a site with none may take an afternoon plus testing.
If you want a community theme that styles profiles, groups, feeds and messages out of the box, take a look at Reign, then run this checklist on a staging copy before you touch the live site.