
Everyone wants to create a safe online space for people who share the same interest so they can discuss their personal opinions without any hitch. That’s why we’ll use how to use reign theme and leverage plugins to create a basic community WordPress site, go through some important setting options and also clear some doubts we receive.
For this guide, I have used localwp for creating a local site, but you can also use Tastewp for a temporary website to test out your idea. But remember, if you want to publish this very site you are working on, get a hosting (we have added a few resources you can use).

Why Choose WordPress to Create Your Community Website?
Building an online community requires a flexible, scalable, and user-friendly platform. WordPress stands out as the best choice for creating a community website due to its powerful features, customization options, and vast ecosystem of plugins and themes. Here’s why WordPress is the ideal solution:
1. Easy to Set Up & Use
WordPress is known for its user-friendly interface, making it accessible to both beginners and experienced developers. With a few clicks, you can install WordPress, choose a theme, and set up your community website without needing to code.
2. Extensive Customization Options
With thousands of themes and plugins available, you can customize your website to match your community’s identity. Themes like Reign BuddyPress and plugins like BuddyPress and BuddyBoss help create a social network-style platform.
3. Powerful Community Features with BuddyPress & BuddyBoss
WordPress allows you to add community-specific features using plugins like:
-
BuddyPress - Adds social networking features (user profiles, groups, activity streams, messaging).
-
BuddyBoss - A more advanced version of BuddyPress with better UI and community management tools.
-
bbPress - Enables forums and discussion boards.
4. Scalability & Performance
Whether you’re starting a small niche community or planning a large-scale social network, WordPress can handle your needs. With the right hosting and optimization, your site can grow without performance issues.
5. Monetization Opportunities
Turn your community into a revenue-generating platform by integrating:
-
Membership subscriptions (via Paid Memberships Pro or MemberPress).
-
eCommerce features (WooCommerce for selling products or merchandise).
-
Paid content & courses (LearnDash for eLearning communities).
6. SEO & Marketing-Friendly
WordPress is SEO-optimized, helping your community get discovered through search engines. Plugins like Yoast SEO improve rankings, while integrations with email marketing tools (Mailchimp, ConvertKit) help grow engagement.
7. Secure & Regularly Updated
WordPress receives frequent security updates to protect your site. By using security plugins like Wordfence and SSL encryption, you can ensure a safe environment for your members.
8. Open-Source & Cost-Effective
Unlike closed community platforms, WordPress is free and open-source, meaning you have full control over your site’s data and functionality without expensive subscription fees.
Hosting Recommendation
Some hosting recommendations are:
Read about hosting in detail : Best Hosting for BuddyPress Plugins Powered Community Site
Understand BuddyPress
BuddyPress is a free and open-source WordPress plugin that transforms a standard WordPress site into a fully functional social network or online community. It allows users to create profiles, form groups, send private messages, post activity updates, and engage with others - similar to platforms like Facebook but within a self-hosted WordPress environment.
It is highly customizable, integrates well with other plugins (like WooCommerce and forums), and is ideal for building member communities, intranet sites, niche social networks, and learning platforms. Developers and site owners can extend its features using add-ons and themes tailored for BuddyPress.
Key Features of BuddyPress
-
User Profiles - Allow members to create and customize their profiles with avatars, cover images, and custom fields.
-
Activity Streams - Similar to a social media feed, users can post updates, like, comment, and interact.
-
Private Messaging - Enable one-on-one and group messaging between community members.
-
Friend Connections - Let users add friends, similar to social networking platforms.
-
Groups - Users can create and join public, private, or hidden groups for discussions.
-
Forums Integration - Seamlessly integrates with bbPress to add discussion forums.
-
Notifications - Members receive real-time notifications for friend requests, messages, and activity mentions.
-
User Roles & Permissions - Control member access and privileges within the community.
-
Site-Wide Search - Users can search for other members, groups, and activities.
-
Customization & Extensions - Easily extend features using plugins, themes, and custom development.
BuddyPress is perfect for building online communities, social networks, membership sites, and learning portals on WordPress!
Steps to Create an Engaging No-Cost Online Community Website
- Install and activate the Reign theme
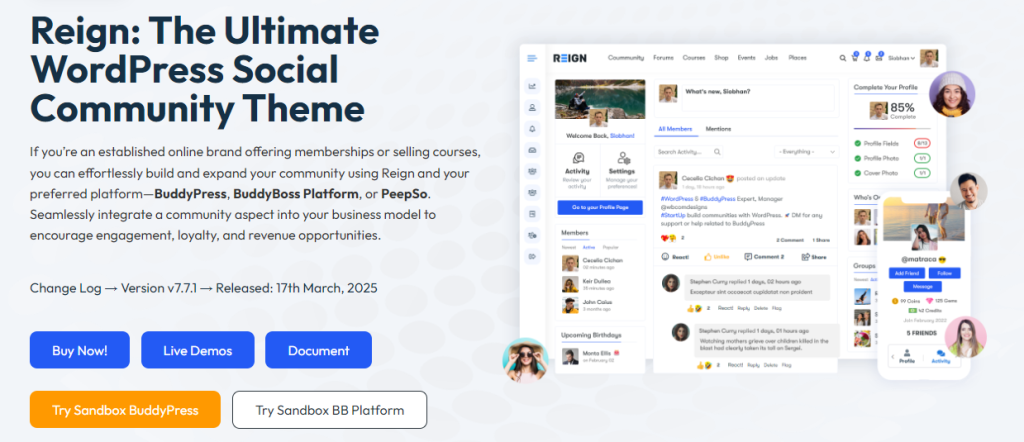
Download Reign theme - Go to the dashboard, install and activate the recommend plugins for better developing experience
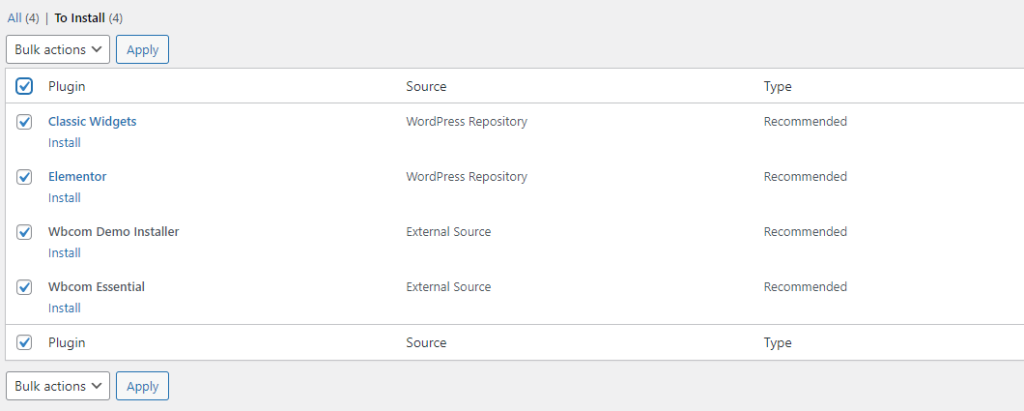
Install and activate the recommend plugins - Now you have the option to select which theme you want. We multiple free demos to try. So here I have chosen the Reign Community for the purpose of the blog.
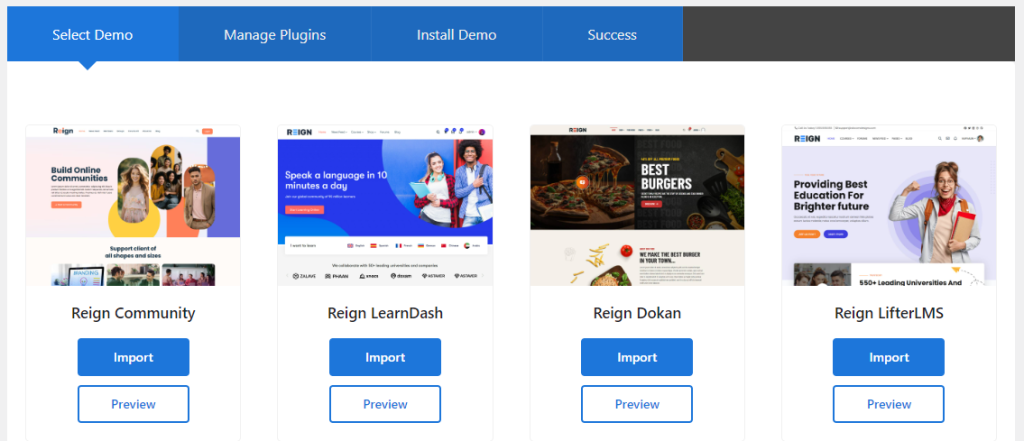
Select which theme you want - After this you be asked to add few plugins, simply click “Install Now” (These plugins are based on the option you chose on step 3)

Install Required Plugins - It was required to install WooCommerce as it will help to monetize your community (You sell custom merch like hoodies or stationary).
- After setting up your shop and site, the bones of the community are ready! So let us customize it.
-
- Simply go to the top right-hand corner, there you’ll find the Customize option. It will take you to the backend UI to help customize the site.

- Now explore the tabs here. As an overview, here’s what you find in each tab:
- Simply go to the top right-hand corner, there you’ll find the Customize option. It will take you to the backend UI to help customize the site.
-
Site Identity
-
Upload and set a Logo that represents your brand or community.
-
Define the Site Title to clearly state your website’s name.
-
Add a Tagline to briefly describe the purpose of your site.
-
Upload a Site Icon (favicon) that appears in the browser tab and bookmarks.
General Settings
-
Typography: Customize fonts, sizes, weights, and spacing for headings, body text, and buttons.
-
Font Awesome: Toggle the Font Awesome library on or off for icons and UI enhancements.
-
Layout Settings:
-
Adjust blog page layouts, post widths, and sidebar positioning.
-
Set dimensions for content areas to maintain a clean design.
-
Enable a scroll-up button for easy navigation.
-
Add a site loader (useful for heavy sites that require content to load fully before display).
-
-
Page Mapping: Modify how different pages link to menus and sections within your site.
-
Login/Sign-Up Page: Customize the registration and login page design to match your brand.
-
Dark Mode: Enable or disable a dark mode option for better accessibility and user experience.
-
Custom Code Integration: Add custom tracking codes (Google Analytics, Facebook Pixel) and customize header & footer scripts.
Header
-
Modify the header layout to align with your branding and user needs.
-
Customize the top bar (add contact info, social links, or notifications).
-
Enable a sticky menu to keep navigation visible while scrolling.
-
Optimize for mobile responsiveness to ensure usability on all devices.
-
Customize the left panel for site-wide navigation enhancements.
Sub Header
-
Customize the sub-header layout and design to match your branding.
-
Add breadcrumb navigation to improve user experience.
Colors
-
Apply a custom color scheme to align with your community branding.
-
Choose from preloaded color schemes for quick customization.
Forms
-
Customize form styles, including input fields, buttons, and validation messages.
-
Modify form layouts to improve user experience in community interactions.
Menus
-
Easily add or modify menus from the front-end without needing to access the backend.
-
Organize menu items to enhance navigation.
-
Set different menu structures for desktop and mobile views.
Widgets
-
Add and manage widgets directly from the front-end customization panel.
-
Customize widget placements for specific pages and sections.
Homepage Settings
-
Choose between a static page or the latest posts feed as the homepage.
-
Set a custom homepage design tailored for your audience.
Layout Settings
-
Customize layouts for blogs, pages, and products to fit your design preference.
-
Adjust grid/list views for post archives.
-
Set full-width or boxed content display options.
Community Settings
-
Enable avatars for user profiles and groups.
-
Manage settings for members, groups, and navigation menus.
-
Configure community-specific features such as profile covers, media uploads, and group discussions.
Branded Login & Register
-
Customize the login and registration pages to reflect your community identity.
-
Add a background image, logo, and custom fields to the registration form.
-
Adjust the login page layout, colors, and typography.
WooCommerce
-
Customize the design and layout of the product, store, cart, shop, and checkout pages.
-
Modify button colors, font styles, and page layouts for better user experience.
-
Enhance product display with custom grids and filters.
Footer
-
Modify the footer layout to match your branding and community theme.
-
Add useful links, social media icons, and copyright information.
-
Enable multi-column footers for better organization.
BuddyBoss Platform
-
Customize Profile Navigation to improve user experience.
-
Modify Profile Action Buttons (e.g., message, follow, add friend).
-
Configure BuddyBoss Email Templates for community notifications.
Additional CSS
-
Add custom CSS code to fine-tune the site’s appearance beyond built-in options.
-
Modify specific elements such as buttons, forms, menus, and animations.
- Now that our site represents the community, we need to make it accessible and functional so go to the backend
- Go to BuddyBoss and enable different fields like “Social Groups”, “Forums Discussions” and more.
- Under WB Plugins, change the settings of installed plugins according to your requirements.
7. Some plugins to add to increase the functionality of your community
Community & Social Engagement:
-
BuddyPress Community Bundle - A set of add-ons that improve user profiles, activity feeds, and groups.
-
BuddyPress Moderation - Allows community admins to manage user-generated content effectively.
-
BuddyPress Profile Pro - Adds more profile fields and customization options.
-
BuddyPress Private Community - Restricts content to registered members only.
Monetization:
-
BuddyPress Membership - Integrates with Paid Memberships Pro to create a subscription-based community.
-
BuddyPress WooCommerce Integration - Connects WooCommerce with user profiles for social eCommerce.
-
LearnDash Integration - Allows you to sell and manage online courses in your community.
Enhanced User Experience:
-
Reign Theme Addons - Extra customization options for better design and functionality.
-
BuddyPress Sticky Post - Lets you pin important community posts to the top.
-
BuddyPress Hashtags - Enables hashtags in activity streams for better content discovery.
Some key settings to remember
-
- Allow the users to Delete their profiles (Dashboard>BuddyBoss>Settings>General Settings) as it’s a good practice to have.
- Allow non-members to register new accounts (Dashboard>BuddyBoss>Settings>Registration) it’s imprtant for the growth of your community.
- When creating menus, make sure to check the options under Screen Options (Found at top left corner) as it will enable several fields for the menu.
- Make sure to check “Search Engine Visibility” from backend settings if you don’t want a search engine to index the content on your site. (Good to keep on when the site is in development stage)
Try Reign with BuddyPress demo here
Start Creating Social Spaces
Building a no-cost online community website is easier than ever with the right tools and strategies. By leveraging WordPress, community-focused themes, and free plugins, you can create an engaging space for like-minded individuals to connect, share, and collaborate. However, for a truly seamless experience with professional design and functionality, expert guidance can make all the difference. WBcom Designs specializes in building powerful community websites tailored to your needs. Ready to take your community to the next level? Explore our solutions today and create an online space that thrives!

Interesting Reads
How to Sell Courses on Shopify