
Running a successful online store requires more than just listing products; it demands a layout that makes shopping effortless. Many WooCommerce store owners realize that while the default shop layout works for some businesses, it doesn’t always suit those with large catalogs, wholesale buyers, or B2B customers. This is where a product table can completely transform the way your customers shop.
By learning how to Create a Product Table in WooCommerce, you can display items in a streamlined, easy-to-navigate format. This approach not only saves time for your customers but also enhances their shopping experience. Whether you sell digital downloads, spare parts, wholesale goods, or a wide range of product variations, product tables give you the flexibility to present your offerings in a structured, accessible way.

What Is a WooCommerce Product Table?
A WooCommerce product table is essentially a dynamic grid or spreadsheet-like layout that lists multiple products and their details in one place. Unlike the standard WooCommerce shop, which focuses heavily on images and individual product pages, a product table highlights key information such as product names, SKUs, descriptions, prices, stock status, and add-to-cart buttons.
By adopting this layout, your store offers a quick-view shopping experience. Shoppers no longer need to click through multiple product pages to make a purchase decision. Instead, they can filter, search, and sort products directly from a single page. When you Create a Product Table in WooCommerce, you bridge the gap between efficiency and customer satisfaction.
Another standout feature of product tables is flexibility. You can choose which columns to display, customize filters, and allow customers to buy multiple products simultaneously. This turns a simple catalog into a powerful tool that caters to bulk buyers and time-sensitive shoppers alike.
Why Use a Product Table in WooCommerce?
The question isn’t just what a product table is but why it matters. Traditional eCommerce layouts are image-driven, which works well for visual products like fashion or home décor. However, businesses that sell parts, tools, food items, or wholesale products often require a more functional approach.
By choosing to Create a Product Table in WooCommerce, you empower your customers to shop faster. Instead of navigating back and forth between product pages, they can quickly view product details, adjust quantities, and complete their purchase directly from the table. This removes unnecessary steps in the buying journey, reducing cart abandonment and increasing conversions.
Moreover, product tables benefit store owners by providing clarity and structure. For example:
- Wholesale buyers can select multiple SKUs in one go.
- Educational institutions can order supplies in bulk efficiently.
- Digital product sellers can list dozens of downloadable files in a neatly organized manner.
The faster your customers find what they need, the more likely they are to return for future purchases.
How to Create a Product Table in WooCommerce: Step-by-Step Setup Guide
Now that you understand the importance, let’s walk through the practical steps. To achieve this, you’ll need the WooCommerce Product Table plugin by Barn2. This plugin is widely regarded as the most powerful and user-friendly solution for building dynamic product tables.
Step 1: Install and Activate the Plugin
First, purchase and download the WooCommerce Product Table plugin from Barn2’s official website. Once you have the plugin file, head to your WordPress dashboard.
- Go to Plugins > Add New.
- Click Upload Plugin and select the downloaded file.
- Install and then activate it.

After activation, the plugin adds new options under WooCommerce settings, allowing you to configure your product tables.
Step 2:
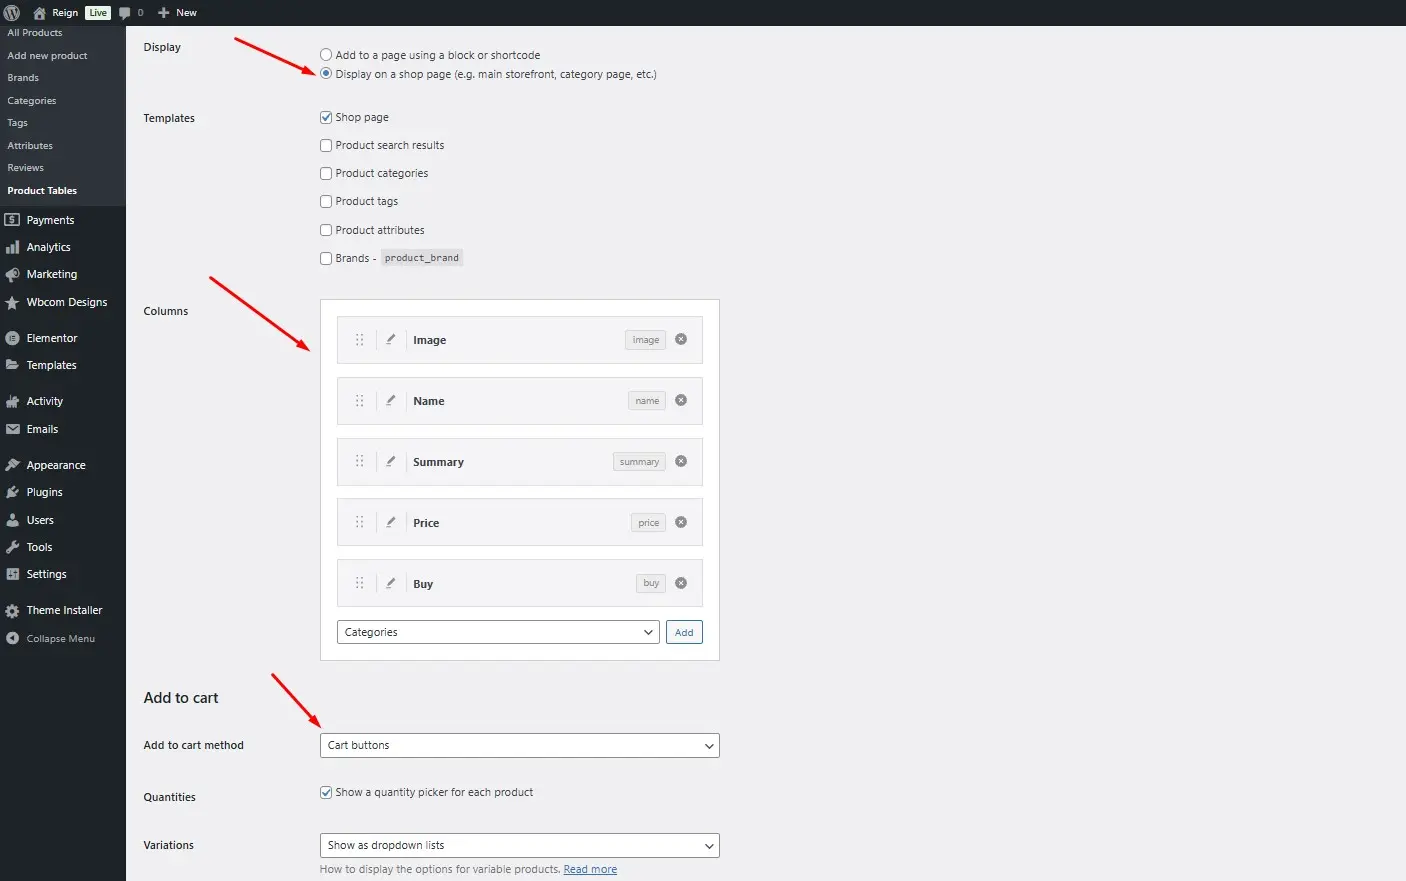
Next, navigate to WooCommerce > Settings > Products > Product tables. Here you’ll find global settings for your product tables. You can:
- Choose default columns (such as product name, description, price, add-to-cart button).
- Enable filters for categories, tags, and attributes.
- Decide whether to show product images.
- Select pagination and number of products per page.
This step ensures that every product table you generate reflects your brand’s needs and your customers’ shopping style.
Step 3: Insert a Product Table into a Page
To actually Create a Product Table in WooCommerce, you’ll use the shortcode provided by the plugin. For instance:
[product_table]
This shortcode can be inserted into any WordPress page or post. You can also customize it by adding parameters like category, tags, or column types.
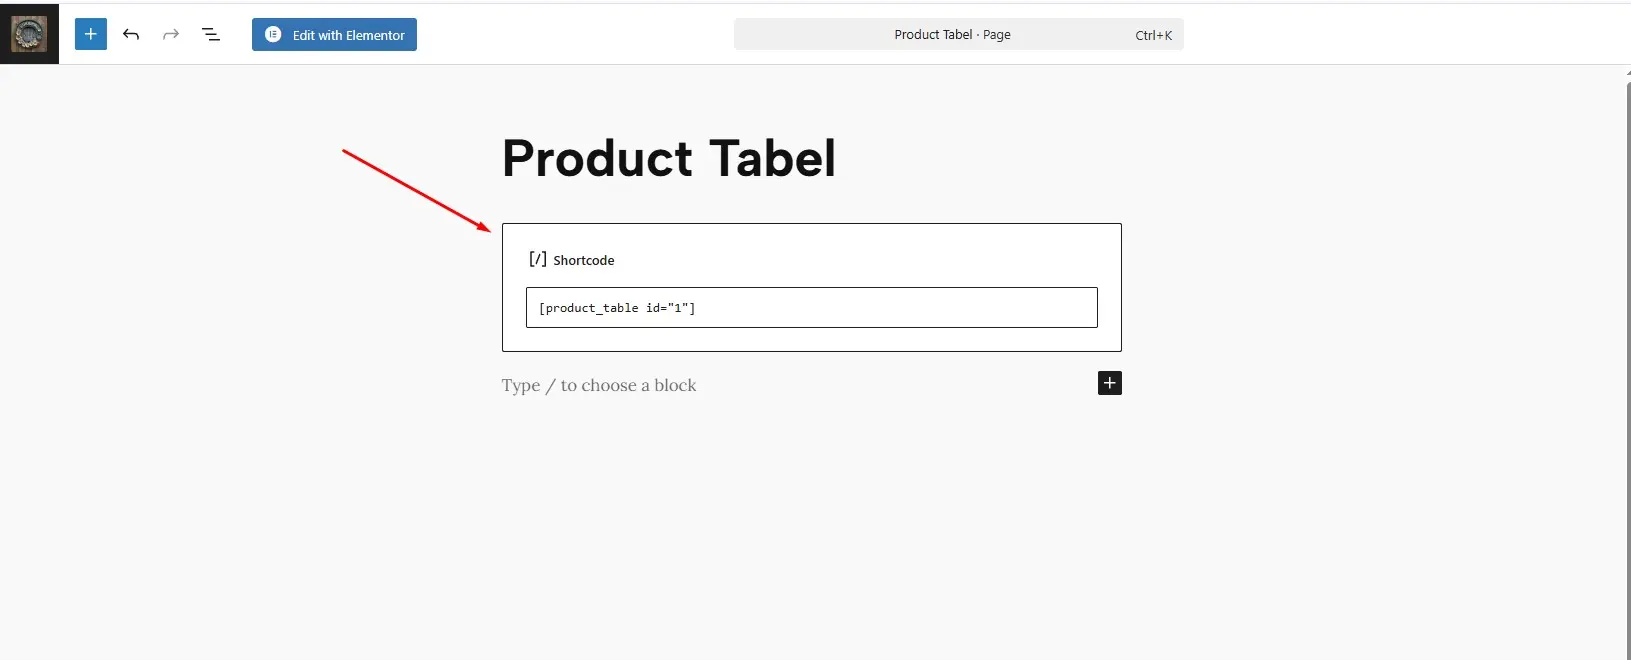
For example, if you want to display only products from a specific category, your shortcode might look like this:
[product_table category="accessories"]
Step 4: Customize Columns and Filters
Barn2’s plugin allows deep customization. You can add or remove columns depending on what’s most useful for your audience. Commonly used columns include:
- SKU
- Stock level
- Short description
- Variations dropdown
- Add-to-cart button
Additionally, enabling filters allows customers to quickly sort through products by category, attribute, or tag. This is particularly valuable for large inventories.
Step 5: Enhance User Experience with Advanced Features
You can take your product tables further by enabling:
- Quick add-to-cart: Let customers add multiple products with one click.
- Quantity selectors: Allow bulk buyers to choose product quantities easily.
- Instant search and sort: Help customers locate products instantly without leaving the page.
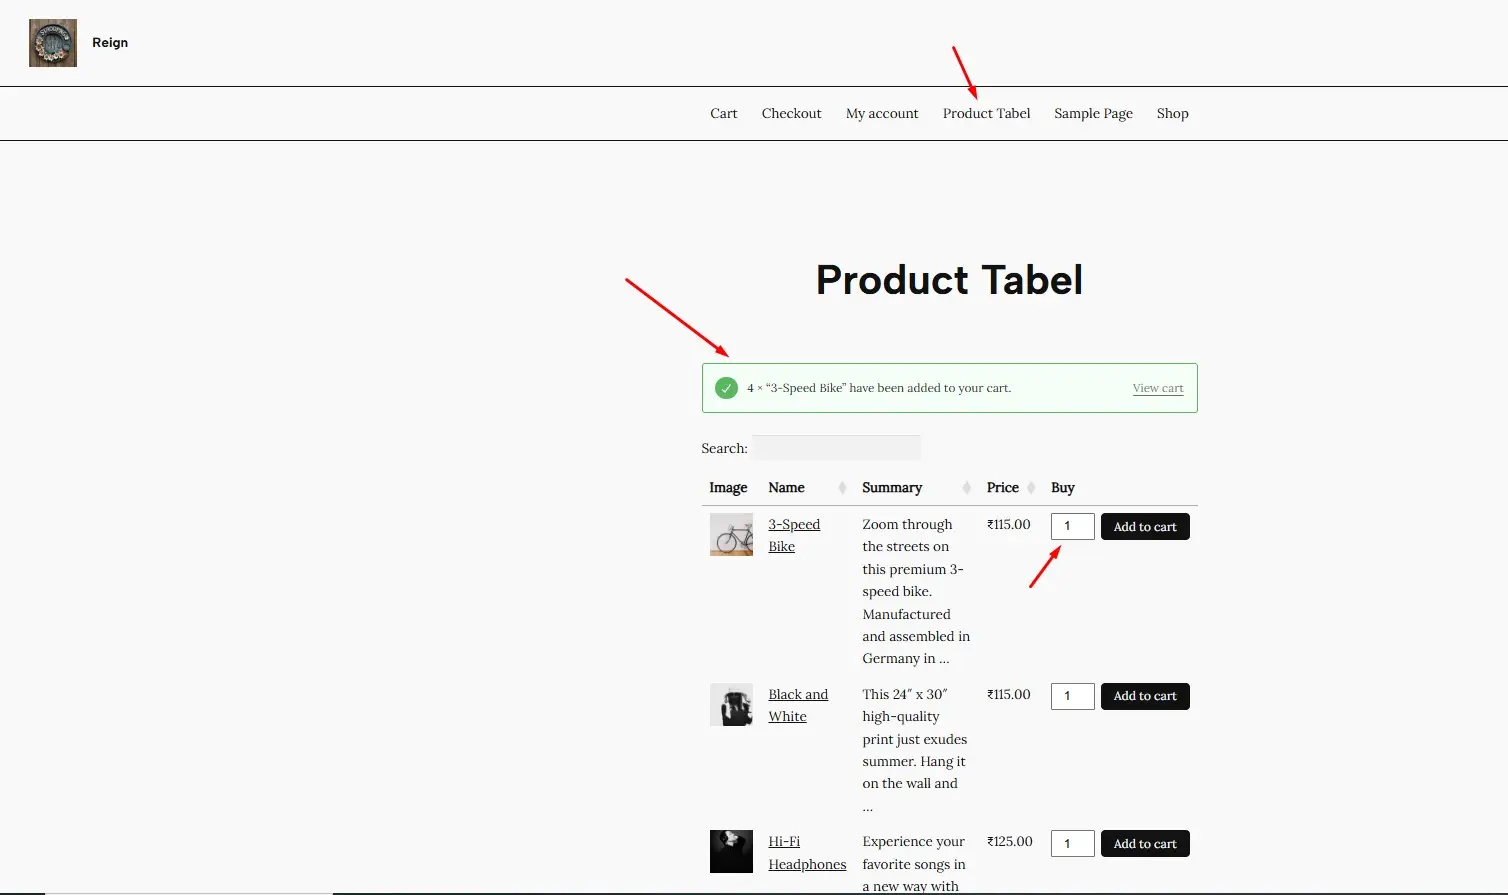
With these enhancements, your WooCommerce store shifts from being product-centered to customer-centered, ensuring seamless usability.
Creative Ways to Use WooCommerce Product Tables
Product tables are not limited to standard product catalogs. They can transform niche stores as well. For instance:
- Wholesale Stores: Offer bulk purchase options directly in the table.
- Restaurant Menus: Showcase food and drinks with order buttons on a single page.
- Digital Downloads: Present music tracks, PDFs, or courses in an organized layout.
- Parts & Components: Display spare parts with SKUs and stock status clearly visible.
When you Create a Product Table in WooCommerce, you give your store the versatility to cater to multiple industries. By aligning the layout with your target audience’s needs, you improve shopping flow while keeping the backend management efficient.
Benefits Beyond Just Design
The beauty of product tables extends beyond visual appeal. They streamline decision-making, reduce bounce rates, and provide a professional look to your store. Customers appreciate being in control of their shopping process, and product tables deliver exactly that.
Also, the SEO benefits shouldn’t be overlooked. Since each product table can be placed strategically on landing pages or blog posts, you can target niche keywords. For example, inserting a table on a “Best-Selling Accessories” page helps optimize for long-tail keywords, enhancing organic reach.
In short, when you Create a Product Table in WooCommerce, you’re not just improving design—you’re optimizing usability, conversions, and search visibility.
Common Mistakes to Avoid
While the setup process is straightforward, there are a few pitfalls you should steer clear of.
- Cluttering the Table with Too Many Columns
Keep your product table clean. Too many details may overwhelm your customers. Select only the most relevant columns. - Ignoring Mobile Optimization
Always test your product tables on mobile devices. The Barn2 plugin automatically handles responsiveness, but ensure the layout fits your audience’s needs. - Not Using Filters and Search
A product table without filters is like a library without an index. Always include ways for customers to refine their search.
Avoiding these mistakes guarantees that your WooCommerce product table delivers both style and function.
Advanced Tips for Maximizing Sales with Product Tables
Once your product table is live, it’s time to optimize for sales. Here are strategies you can apply:
- Highlight Best-Sellers: Use categories to spotlight trending products.
- Enable Quick View Pop-Ups: Let shoppers preview product details without leaving the page.
- Upsell Through Variations: Showcase premium product variations in the table.
- Bundle Products: Encourage bulk purchases by creating bundles visible in the product table.
By refining these elements, you ensure that your decision to Create a Product Table in WooCommerce directly contributes to higher revenue.

Final Thoughts
Shoppers expect speed, convenience, and clarity. A product table delivers all three while giving your WooCommerce store a professional and user-friendly edge. By using the Barn2 WooCommerce Product Table plugin, you can transform your store into a high-conversion powerhouse.
When you decide to Create a Product Table in WooCommerce, you’re not only enhancing customer experience but also ensuring your business stays competitive in the evolving eCommerce landscape. Invest in the right plugin, follow the setup guide carefully, and watch how your sales and customer satisfaction improve.
Interesting Reads:
How to Enable Order Numbers Pro in WooCommerce